ArcMap data publication
Data publication is provided by the Desktop GIS GeoCat Bridge tool included with your GeoCat Live service. GeoCat Bridge is available as a Desktop plugin for either ArcMap (10.4+) or QGIS (3.6+), with ArcGIS Pro planned.
Reference
Geocat Bridge ArcMap Extension
GeoCat Bridge enables you to publish the layers from an ArcMap map project (MXD) to GeoCat Live mapping services (GeoServer WMS/WFS/WCS) and record the metadata of these layers to GeoCat Live catalog services (GeoNetwork CSW).
Manual layer publication requires:
- Export and upload the datasets to the server
- Convert the ArcMap symbology to standard
OGC:SLDformat - Publish layers (using the datasets and styles) in GeoServer
- Upload the metadata of the datasets into GeoNetwork
- Configure the linkage between GeoServer layers and metadata
By using GeoCat Bridge the above steps are managed by Bridge by the click of a button.
Besides publishing the maps to GeoServer or MapServer, Bridge will also publish metadata of your datasets to a geospatial catalogue. When publishing metadata to a catalogue Bridge will convert the ArcGIS metadata to ISO19139 format and upload it to the catalogue. Bridge supports a number of different metadata profiles.
When publishing both metadata to a catalogue and layers to a map server, Bridge will update the metadata to include in the metadata the URL of the map service the layer is published in. So when searching for the dataset in your catalogue you can also find the map service. At the same time Bridge also adds the url of the metadata to the layer in the map server. So the capabilities document will contain the url of the metadata for that layer.
Download and Configuration
Download and install GeoCat Bridge.
-
Download the relevant plugin from https://my.geocat.net/download
 ArcMap Bridge 3 Download
 -
Use the GeoCat Bridge 3 Setup wizard to install.
Follow the GeoCat Bridge Manual Installation instructions.
-
Request a license for the ArcMap edition via our support desk at support@geocat.net (or order the trial version of Bridge).
Follow the GeoCat Bridge Manual Initial Configuration instructions to configure and activate.
Configure Servers
In order to publish your data you have to configure the target servers.
-
The configuration window is accessed using the Bridge Menu:
Tools❯Publish Servers. -
Press the add button (+ symbol), and select
GeoCat Livefrom the list.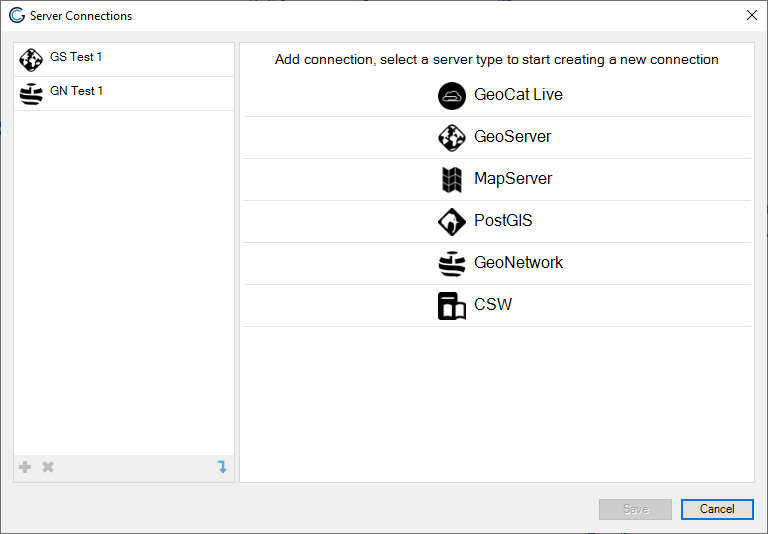 Server connections
 -
Fill your GeoCat Live connection details.
-
Instance identifier is the name of your GeoCat Live service.
This name appears in the URL used to access the service:
https:/<instance identifier>.geocat./live/. -
GeoServer user name and password provided via email.
-
GeoNetwork user name and password provided via email.
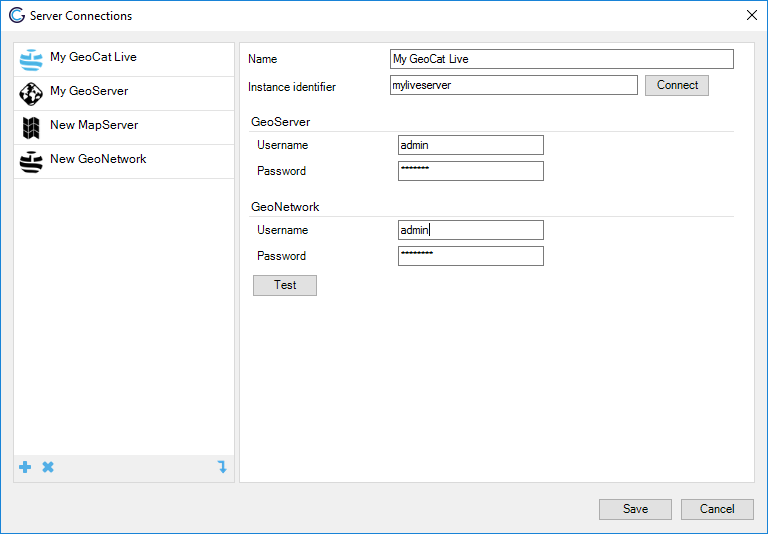 GeoCat Live connection details
 -
-
For more information:
Publication
-
Create an ArcMap project using a vector data source (such as a GeoPackage or Shapefile).
-
Introduce some styling for your layer.
-
You can now publish your data by opening the Publish window.
 Publish
Reference
-
After styling the data it's time to add some or update existing metadata.
The Bridge Metadata editor shows a minimal set of metadata properties required to create a valid metadata record. The metadata is retrieved and stored in ArcGIS. If you need more advanced and detailed editing of metadata you can use the ArcGIS metadata editor. Note that changes on metadata are also stored locally with the data (in SDE, FGDB or XML).
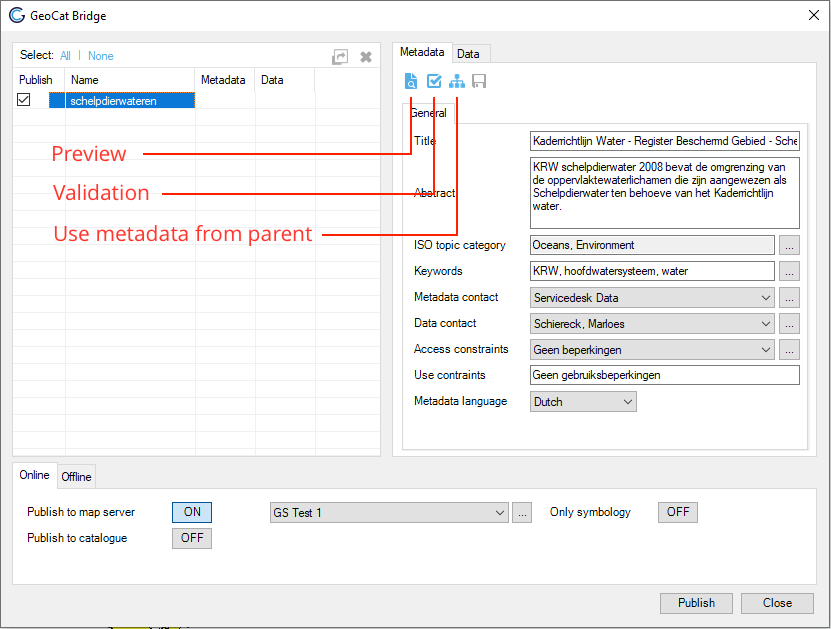 Metadata tab for selected layer
Reference
-
After adding the metadata select both Publish to map server and Publish to catalogue from the dropdown list (see the bottom of the dialog Online tab).
Press the publish button.
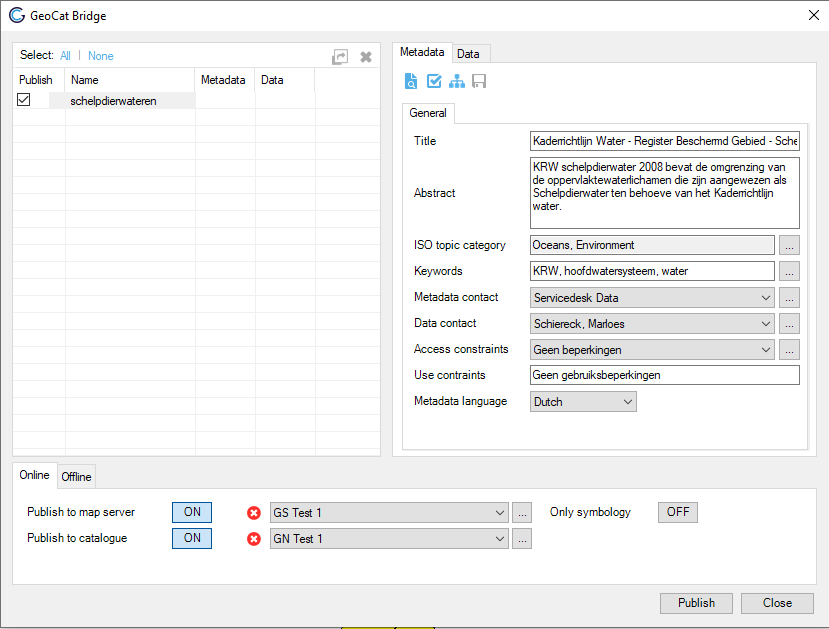 Publish to online web services
 -
The Publish result screen will show the result of the publication.
- Double click any error or warning to display more details.
- In the publish window you can now right click on a layer and from the context menu view the published metadata record or a preview of the map service.
-
Bridge has two distinct modes for data publication to GeoServer:
- Basic mode: select an existing workspace where new layers are to be published.
- Workspace mode: a new workspace is created for each
mxdthat you publish, completely replacing prior content.
Workspaces are used to organize information in GeoServer, similar to folders.
Warning
Please be careful with Workspace mode when working with an existing GeoServer, this approach completely replaces the prior contents of an existing workspace. This is intended for Bridge users to updating a map with new content, however it can be dangerous if accidentally used to replace a GeoServer workspace that has been setup manually.
-
Bridge has an option to publish data to a local GeoPackage, Shape, Metadata and/or SLD file.
A GeoPackage will contain data, metadata, SLD and Context (layer hierarchy). Style and context are not part of the GeoPackage standard, but introduced as part of the OWS-Context GeoPackage extension.
The extended GeoPackage can be opened in for example QGIS to reproduce the full project including style and metadata. This requires the QGPKG extension in QGIS.
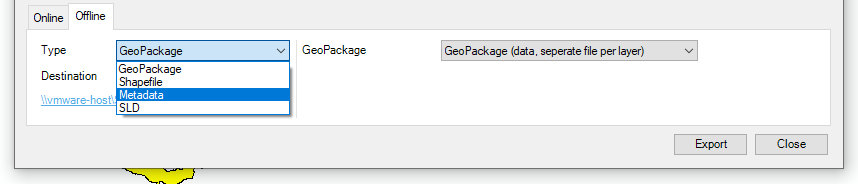 Offline publication