Installation on Linux
To install GeoServer Enterprise in Linux, follow these steps.
Java
GeoServer Enterprise requires a Java 8 environment.
OpenJDK is now the lead project for the Java ecosystem. As an open-source company GeoCat is pleased to see OpenJDK supported by a number of different distributions.
We recommend using OpenJDK 8 provided by your operating system:
Ubuntu
sudo apt-get install openjdk-8-jdkRedHat:
sudo yum install java-1.8.0-openjdk-develTo manually install Java, see Manual Linux Java Install
Verify that java is available:
java -versionopenjdk version "1.8.0_262" OpenJDK Runtime Environment (build 1.8.0_262-b10) OpenJDK 64-Bit Server VM (build 25.262-b10, mixed mode)
Apache Tomcat
Apache Tomcat is the leading open source application server.
GeoServer Enterprise supports Apache Tomcat 8.5.x or 9.0.x.
Installation options:
Verify that tomcat is available as a service:
Ubuntu
sudo service tomcat9 statusCentOS
systemctl status tomcat
The application server is available on port 8080:
Data Directory
GeoServer places all its required configuration files in a GEOSERVER_DATA_DIR folder.
This location my be explicitly provided, to do so, follow these steps:
Create a folder to hold your GeoServer Enterprise configuration:
sudo mkdir /var/opt/geoserver/
We have three options for creating an initial GeoServer data directory:
Alternative 1 - Use the default data directory with recommended service configuration settings.
Login to nexus.geocat.net and browse to the enterprise folder:
Navigate to the latest geoserver release and select the
geoserver-data-defaultzip archive.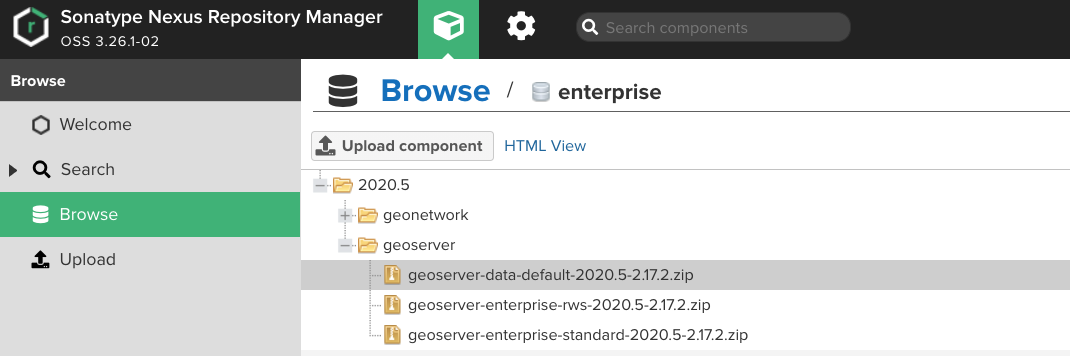
Locate latest geoserver-data-default zip archive
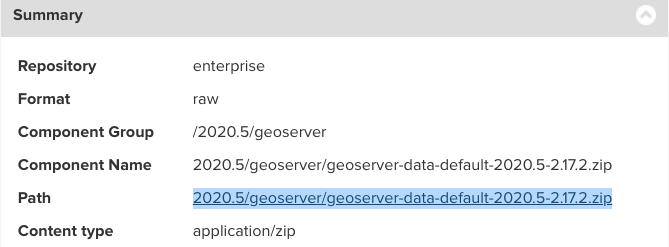
Copy the download URL from the asset summary Path link.
Latest geoserver-data-default zip URL
Use wget to download the URL:
mkdir /tmp/geoserver-enterprise
cd /tmp/geoserver-enterprise
wget --http-user='USERNAME' --http-password='PASSWORD' https://nexus.geocat.net/repository/enterprise/2020.5/geoserver/geoserver-data-default-2020.5-2.17.2.zip
geoserver-data-default-2020.5-2.17. 100%[================================================================>]  10.41K  --.-KB/s    in 0.002s

2020-09-11 09:11:00 (5.03 MB/s) - ‘geoserver-data-default-2020.5-2.17.2.zip.1’ saved [10663/10663]
Unzip this archive:
cd /tmp/geoserver-enterprise
unzip geoserver-data-default*.zip
extracting: data.zip
 inflating: windows/geoserver.xml
 inflating: linux/geoserver.xml
 inflating: README.txt
Unzip the
data.zip:unzip data.zip -d /var/opt/geoserver/data
Note
If wget or unzip are not installed, you can install the packages;
# Ubuntu
sudo apt-get install wget
sudo apt-get install unzip

# CentOS
sudo yum install wget
sudo yum install unzip
Alternative 2 - Use the standard data directory with recommended service configuration settings, and a selection of example layers:
unzip geoserver-enterprise-data.zip
extracting: data.zip
 inflating: windows/geoserver.xml
 inflating: linux/geoserver.xml
 inflating: README.txt
Unzip the
data.zip:unzip data.zip -d /var/opt/geoserver/data
Alternative 3 - Use an empty folder, GeoServer will generate configuration files to this folder the first time it runs:
cd /var/opt/geoserver/
mkdir data
This approach is often used in automated workflow where GeoServer is configured via REST API scripts.
Note
You must also remove this line from your Geoserver Tomcat context file;
<Parameter name="GEOSERVER_REQUIRE_FILE"
   value="/var/opt/geoserver/data/global.xml" override="false"/>
Create an empty
tilecachefolder:sudo mkdir /var/opt/geoserver/tilecache
The GeoWebCache tile server will use this empty folder to manage generated tiles.
Ensure the tomcat user has permission to access the above directories:
sudo chown -R tomcat:tomcat /var/opt/geoserver
sudo chmod +r+w -R /var/opt/geoserver
Update the Tomcat configuration with this data directory location:
Open the Tomcat folder (
/var/lib/tomcat9/,/opt/tomcat/latestor/etc/tomcat9) and navigate to theconf/Catalina/localhostsubfolder.In the
localhostfolder, create ageoserver.xmlfile, with the following content:<Context docBase="geoserver.war"> <Parameter name="GEOSERVER_DATA_DIR" value="/var/opt/geoserver/data" override="false"/> <Parameter name="GEOSERVER_REQUIRE_FILE" value="/var/opt/geoserver/data/global.xml" override="false"/> <Parameter name="GEOWEBCACHE_CACHE_DIR" value="/var/opt/geoserver/tilecache" override="false"/> </Context>
Note the
conf/Catalina/localhost/folder is created when you first run Tomcat.The default on recent Ubuntu is to provide and operating system systemd sandbox for services.
Provide tomcat9 service read/write permissions to the GeoServer Data Directory and the GeoWebCache tile cache directory:
Edit the Tomcat systemd configuration. This is likely in
/etc/systemd/system/multi-user.target.wants/tomcat9.serviceIn the
[Service]section, add these lines:ReadWritePaths=/var/opt/geoserver/data ReadWritePaths=/var/opt/geoserver/tilecache
If you will be writing anywhere else on the file system, also add those directories here.
Ask systemd to read these changes, and restart Tomcat
sudo systemctl daemon-reload
sudo service tomcat9 restart
GeoServer Enterprise
To install GeoServer on your existing Tomcat instance, follow these steps:
Login to nexus.geocat.net and browse to the enterprise folder:
Navigate to the latest geoserver release and select the
geoserver-standardzip archive.
Unzip this file containing:
windows- sample configuration filesgeoserver.war- geoserver enterprise web applicationGPLandLICENSE.txtopen source license information
Copy the
geoserver.warweb archive to the to[Tomcat_folder]/webappsfolder.The
[Tomcat_folder]will be either/var/lib/tomcat9/or/opt/tomcat/latest.Tomcat will deploy
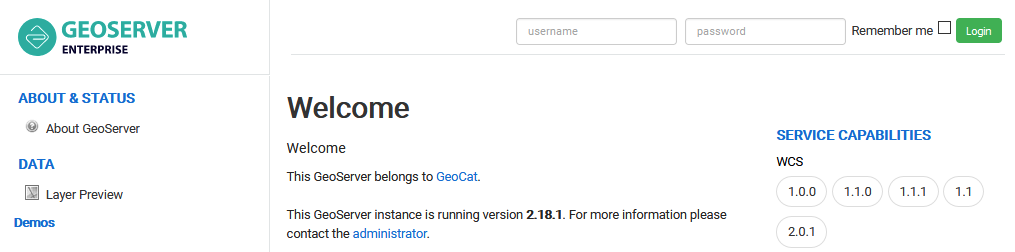
geoserver.warweb application, creating the folder webapps/geoserver when you first run Tomcat.In your web browser, navigate to localhost:8080/geoserver to verify that GeoServer Enterprise is correctly working.